Recently, I was working with one of my clients on a Power Automate solution to convert Wiki pages to PDF. While building this solution, we encountered an unexpected authentication request when a specific action within The Power Automate Flow was requesting that the user’s credentials (Password) be entered in plain text.
Unsurprisingly, my client was not comfortable with passing credentials directly in the Power Automate action and in plain text. He had 2 specific reasons for his discomfort and I’m sure you’ll agree with both of them.
- The Power Automate solution was going to be shared with his other colleagues and he did not want any sensitive information to be present in plain text.
- Their Information Security team had released some organizational policies that prohibited employees from entering sensitive information in Cloud Apps or services , without some kind of encryption being present.
I thought that this must be a fairly common requirement, so I began exploring workarounds. Finding a workaround turned out to be quite a bit more effort than I thought it would, but finally, The Azure Key Vault came to the rescue with a fairly elegant solution.
‘Azure Key vault’ in simple terms, is a tool that allows you to securely create, store, and access your secrets.
In this blog post, we’re going to configure an Azure Key vault, create a Secret inside it, and then use this Secret within our Power Automate solution.
Before we begin, please make sure the following prerequisites are in place:
- An Office 365 subscription with access to Power Automate (Flow).
- An Azure Subscription to create an Azure Key vault.
- Muhimbi PDF Converter Services Online full, free or trial subscription (Start trial). This is just to demonstrate the concept, you can use Key vault without this service.
- Appropriate privileges to create Power Automate(Flow).
- Working knowledge of Power Automate(Flow).
Creating an Azure Key Vault instance in The Azure Admin Portal –
Login to the Azure portal and select the Key vaults option as shown below-

On the page that opens up, click on ‘+ Add’ as shown in the image below-

A form will pop up, asking you for the details required to create a new Key Vault. Fill in the form as per the image after these term explanations-
Subscription –
Select the correct Azure subscription from the drop down menu.
Resource group –
Either select an existing resource group from the drop down menu or create a new resource group that will act as a container for the newly created Azure Key Vault.
Key vault name–
Give the Key a meaningful name, since we will require it later for creating a connection to The Azure Key Vault in the Power Automate environment.
Region-
Select a region from the drop down menu where you want to host your Azure Key Vault.
Pricing tier-
Azure Key Vault is available in 2 Pricing tiers, Standard and Premium. To see details on what support is available with which pricing tier, please click here.
Soft delete and Retention days-
Soft delete allows you to recover a deleted Key Vault or objects within a Key Vault within the retention period specified.
Enable the Soft delete option and specify the retention period.
Purge Protection-
When purge protection is on, a vault or an object in the deleted state cannot be purged until the retention period has passed.

Once the form is filled-in, click on ‘Next > Access Policy‘ and then we’ll define the permissions and access policy for the Azure Key vault.
As shown in the image below, make sure the ‘Secret Message‘ entity has ‘Get‘ permission selected, so that we can retrieve the Secret created inside the Key vault from Power Automate action.
Note – The permission mentioned above for ‘Get‘ is configured by default but please just go ahead and confirm this.

Next, click on ‘Review + Create‘. Azure will run a series of validation steps and check if the configurations pass the standards.
Once everything looks okay and ‘Validation Passed‘ is displayed on your screen,click on ‘Create‘.

Sit back and relax, Azure will now create a resource group with the configurations mentioned in the form and complete the deployment of The Azure Key Vault.
Once completed, you will get a confirmation message as shown in the image below-

Next, let’s head back to the resource that we have just created and add our ‘Secret Key‘ in the Azure Key Vault.
Create an Secret Key in the Azure Key Vault –
Configure the ‘Create a secret‘ as shown in the image below and click on ‘Create‘.
The ‘Value‘ field is where your actual password needs to be entered.

Create a connection in Flow portal for Azure Key Vault –
Now we need to create a connection for The Azure Key Vault in our Power Automate environment, so that we can use the action ‘Get Secret‘ in our Power Automate solution.
Navigate to The Flow portal and on the page that opens up, click on the drop down menu available for the ‘Data‘ option and select ‘Connections‘ as shown in the image below.

Search for the term ‘Azure Key Vault‘ on the page that opens up and click on the ‘+‘ sign as shown in the image below.

On the pop up form that opens up, enter the name of Azure Key Vault created earlier and click on ‘Create‘.

Authenticating a Cloud service in Power Automate by using the Secret from Azure Key Vault –
As an example, let’s now use the ‘Convert HTML to PDF’ action (native to The Muhimbi PDF Converter) in Power Automate that has the ability to Convert Web pages (Including SharePoint Online pages) as well as HTML fragments to PDF format.
Below is a list of parameters that need to be configured in the Convert HTML to PDF action of Muhimbi in Power Automate –
- Source URL / HTML: Either a fully qualified URL of the page to convert or an HTML fragment.
- Page Orientation: Specify if you wish to use Portrait or Landscape for the generated PDF file.
- Username: Specify the Username of the account that has access to the HTML page or the HTML fragment that you intend to convert to PDF.
- Password: The password associated with the optional user name. Please note that any password entered here is displayed in clear text to allow field references to be added.

As you can see, the action requires ‘Password‘ to be explicitly entered in Plain text so that it can use these credentials and authenticate against the URL in the SharePoint Online tenant.
This is where instead of actually putting in the ‘Password‘, we are going to pass the ‘Secret‘ created in the Azure Key vault.
First let’s review how the basic structure of our Power Automate (Flow) looks :

Step 1 – Trigger
- We use the SharePoint trigger ‘When a file is created in a folder‘.
- Whenever a new wiki page is created, the Power Automate (Flow) will get triggered automatically.
- For the ‘Site Address‘ in the image below, choose the correct site address from the drop down menu.
- For the ‘Folder Id‘ in the image below, select the source folder.

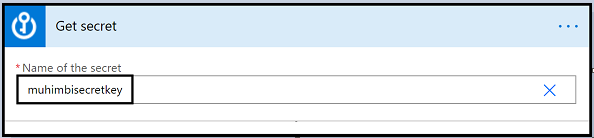
Step 2 – Get Secret
- For the ‘Name of the Secret‘ field as shown in the image below, click on the drop down and it should automatically show you a list of all the different secrets associated with your Azure subscription.
- Select the right secret key, in our case it is ‘muhimbisecretkey‘, the same secret key we created inside our Azure vault earlier.
- But wait, what if someone goes ahead and checks the Power Automate (Flow) Run history. One look and the Run history will reveal the secret in it’s body.
- Thanks to the brilliant idea by Anna Jhaveri, what we can do is configure this (Get Secret) action to Secure the Inputs as well as Outputs as shown in the image below.
- In the ‘Source URL or HTML‘ section shown in the image below, paste the Wiki page URL with the following information:
https://<Sitecollection>/sites/<SiteName>/<NameOfWikiPAgeLibrary>/<FileName>
- The <FileName> highlighted in the URL above is simply the FileName that we obtained from the dynamic content of the trigger action ‘When a file is created in a folder‘.
- In the ‘Page Orientation‘ field, select the appropriate option. Depending on the content and layout of the page ‘Landscape‘ may work out better.
- In the ‘Media Type‘ field, select the ‘Print‘ option from the drop down menu. (This automatically strips out most of the SharePoint User interface).
- Select ‘SharePoint Online‘ as the ‘Authentication type’ from the drop down menu.
- Enter the correct ‘User name‘ .
- For ‘Password’, navigate to ‘Add dynamic content‘ line and select ‘Value‘ present inside the ‘Get Secret‘ action to get authenticated with the SharePoint Online authentication that you selected in the authentication field above.
- In the ‘Conversion Delay’ field, enter a delay of 10000 (in milliseconds, so 10 seconds). This delay will give the page time to load before it is converted.

Step 4 – Create File
- For the ‘Site Address‘ in the image below, choose the correct site address from the drop down menu.
- Select the correct ‘Folder Path‘ where the converted PDF should be created.
- Give a meaningful ‘File Name‘ to the created PDF, but make sure you remember to add the extension ‘.pdf‘ after the ‘File Name‘ and to make the file name unique, or multiple runs of the flow will overwrite the same file. I recommend basing it on the source file name, but with some kind of suffix.
- Select the ‘Processed file content‘ option, shown in the image below, to populate the ‘File Content‘ field.

That is it, create or update a wiki page, wait a few seconds, and then open the generated PDF.
To see the fruits of our labor, please see below what the Wiki page looks like when viewed in a browser and how it looks as a PDF.
Source Wiki Page –


[…] For more details, check out my blog post on ‘Using Azure Key vault to avoid passing Credentials in Power Automate‘. […]
LikeLike
[…] Please check my Blog post on Using Azure Key Vault to avoid passing Credentials in Power Automate […]
LikeLike