A few days back, I was working with one of my customers and his requirement was to make the responses in Microsoft Forms available in Word’s document format. The only reason why he wanted to make these responses available specifically in Word formatted documents, was that his team would later go through the individual responses and add comments to them.
We were brainstorming on how we could fulfill this requirement , when I thought of extracting the responses from the Microsoft Forms and then creating an HTML string composed of those responses. Once I had that HTML string, I could then use one of the third party converters available in the market and bring about it’s conversion to Word.
I was able to achieve this by creating a simple Power Automate solution and using Muhimbi PDF Converter services online , a very flexible product that supports cross conversion between different file formats.
I have distilled my solution into this blog post and following it will allow you to capture data from Microsoft forms and represent it in a Word document. An added feature is that you can also represent this data in Excel, since HTML allows you the ability to showcase data in the form of tables. Perfect- an elegant and flexible solution!
Prerequisites
Before we begin, please make sure the following prerequisites are in place:
- An Office 365 subscription with access to Power Automate (Flow).
- Muhimbi PDF Converter Services Online Full or trial subscription (Start trial).
- Appropriate privileges to create Flows.
- Working knowledge of Power Automate (Flow).
Now, on to the details of how to create a Power Automate (Flow) solution to capture responses from Microsoft forms and convert them into a Word document.
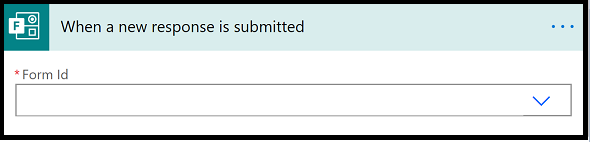
Step 1 – Trigger
- We use the trigger ‘When a new response is submitted’.
- This means that, whenever a new response gets submitted on the configured Microsoft Form, the Power Automate will get triggered automatically.
- For the ‘Form Id’ in the image below, choose the correct Microsoft Form from the drop down menu.
Step 2 – Get response details
- Choose the same Microsoft form as the one in the ‘Trigger’ action above from the drop down menu.
- For the ‘Response Id‘ in the image below, navigate to ‘Add Dynamic content’ screen and choose ‘Response Id‘ from the ‘When a new response is submitted‘ action.

Step 3 – Compose HTML
- Next add a ‘Compose‘ action to your Power Automate (Flow) solution.
- For the ‘Inputs‘ as shown in the image below, we will now configure some HTML so as to represent the captured response in a neat manner in the converted Word document.
- Please copy the HTML configured below this image and paste it in the ‘Inputs‘ field. When doing this, please be sure not to include the quotes.

<!DOCTYPE html>
<html>
<head>
<style>
table {
font-family: arial, sans-serif;
border-collapse: collapse;
width: 100%;
}td, th {
border: 1px solid #dddddd;
text-align: left;
padding: 8px;
}
</style>
</head>
<body><h2>Response Details</h2>
<table>
<tr>
<th>Email of responder</th>
<th>Full name</th>
<th>DOB</th>
<th>Option no 1/2</th>
</tr><tr>
<td> </td>
<td> </td>
<td> </td>
<td> </td>
</tr>
</table></body>
</html>
Important note – You will notice the <td> tags in red in the HTML above. Well you need to navigate to the ‘Add Dynamic content‘ line and choose the responses from the ‘Get response details‘ action and insert it over there, as shown in the image below.

Step 4 – Convert Document
- Next, add a ‘Convert document‘ action and for the ‘Source File Name’,include a proper name with ‘.html‘ as an extension. Here we are using Test.html since we are working with a test Microsoft form.
- For the ‘Source File Content‘, navigate to ‘Add Dynamic Content‘ line, and choose ‘Outputs‘ inside the ‘Compose‘ action.
- Choose ‘Output format‘ as ‘DOCX‘ from the drop down menu.

Step 5 – Create File
- Add a ‘Create File‘ action and for the ‘Site Address‘ in it, choose the correct site address from the drop down menu.
- Select the correct ‘Folder Path‘ where the converted Word document file should be created.
- Give a meaningful ‘File Name‘ to the created Word document, but make sure you remember to add the extension ‘.docx‘ after the ‘File Name’ and to make the file name unique, or multiple runs of the flow will overwrite the same file. I recommend basing it on the source file name, but with some kind of suffix.
- Select the ‘Processed file content‘ option, shown in the image below, to populate the ‘File Content‘ field.

Now go ahead and fill up your Microsoft Form with some responses to set your Power Automate solution in action.
Let us see how it worked out for me.
Microsoft Form with responses –

Output – Word document with captured responses

Keep checking this blog for exciting new articles about Power Automate, SharePoint Online, Power Apps, as well as document conversion and manipulation using The Muhimbi PDF Converter.

Hello, thank you for this.
How would you adapt this to take all the survey results in one go and tabulate them side by side for comparison?
Consider a bidding process where respondents are filling in a form with their company details, services and bids.
Each row would represent the question and each column would represent the respondent.
I would only want to run this process once, after the deadline for responses had passed.
Thank you
LikeLike