This post is part 1 of a 2 part series on Identifying/Recognizing Images captured in Camera control of PowerApps.
In this article, we will capture an Image using the Camera control of PowerApps and then pass it to our Azure Cognitive service for Image Identification/Recognition hosted in Azure environment
This is an advanced topic related to a business scenario since it effectively allows a Power User to consume the Custom Vision API in Azure Cognitive services for Identifying/Recognizing Images.
To reduce the complexity, we will divide this article in four parts:
-
- Design a Canvas App with The Camera Control to capture Image.
- Power Automate (Flow) solution to Identify/Recognize an Image
Prerequisites-
Before you begin, please make sure the following prerequisites are in place:
- An Office 365 subscription with access to PowerApps and Power Automate (Flow).
- An Azure Subscription to host an Image recognition cognitive service.
- Power Automate Plan for consuming the HTTP Custom actions.
- Appropriate privileges to create Power Apps and Power Automate(Flow).
- Working knowledge of both Power Apps and Power Automate(Flow).
Designing a Canvas App with The Camera Control to Capture Image
Step 1- Creating the basic structure of The Canvas App
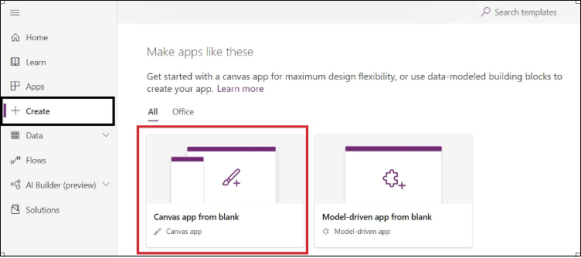
- Go to powerapps.com, sign in with your work or school account, click on the Apps menu in the left navigation bar, and then click on ‘+Create’ and Select Canvas app from blank.
- Specify the Name and the Format of the APP and Click on ‘Create’.

- Add a Camera control as below.
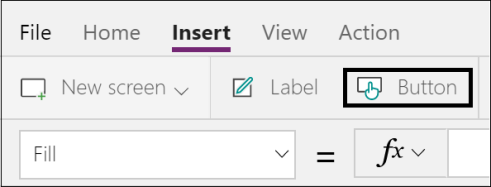
- Now add a Button to the Canvas as shown below.
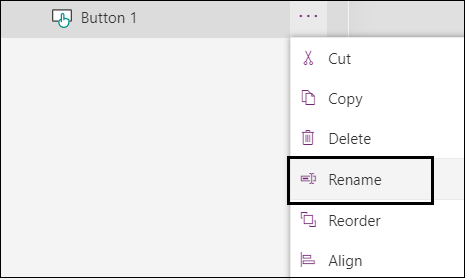
- Next, rename the Button to ‘Submit’ as shown.
- Now that we have the outer body ready, let’s go ahead and configure our components with formulas.
Step 2- Configuring the components with Formula’s
- We will first configure a collection called “collectphoto” to add a captured Image.
- Then,we’ll create variable ‘JSONSample’ and set it with the JSON of the Image.
- Select the ‘OnSelect’ property of the Camera and add the following formula to it:
ClearCollect(collectphoto,Camera2.Photo);Set(JSONSample,JSON(collectphoto,JSONFormat.IncludeBinaryData));
- Now it’s time to add a Power Automate (Flow) to our Power Apps.
- Inside the Action menu, there is an option to add ‘Power Automate’ to your existing Power Apps. To do this, click on the ‘Power Automate’ option as highlighted.
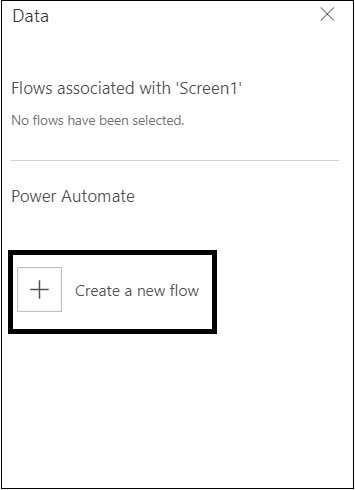
- Then, click on ‘Create a new Flow’ as shown below.
- Rename the Power Automate (Flow) to “AIImageReCogService” and add ‘PowerApps’ as a trigger .
- Once that has been done, add a ‘Compose Action’and select ‘CreateFile_FileContent’ from the Dynamic content in the pane on the right side of the image below.
- Make sure you click on Save.
Note – We completed these steps in the Power Automate (Flow) just so that we can get the Power Automate (Flow) added to our Power Apps. Later in this article, we will add more actions to the Power Automate (Flow), so as to carry out a Image Recognition.
- Finally select the ‘OnSelect’ property of the ‘Submit’ button and add the following formula.
AIImageReCogService.Run(First(collectphoto).Url)
- The above formula tells the ‘Submit’ button to trigger a Power Automate (Flow) with name ‘AIImageReCogService’ created earlier using the .Run() method in which we are passing the JSON of the first image sample sitting in the Image Collection, ‘collectphoto‘.
- Now that we have our Power App ready, let’s head towards configuring the rest of the Power Automate solution.


[…] Design a Canvas App with The Camera Control to capture Images for Identification/Recognition […]
LikeLike